In this user manual we highlight the features and options in ZSS Login IOS to help users interact with the geographical password system for their online security.
Earth's View
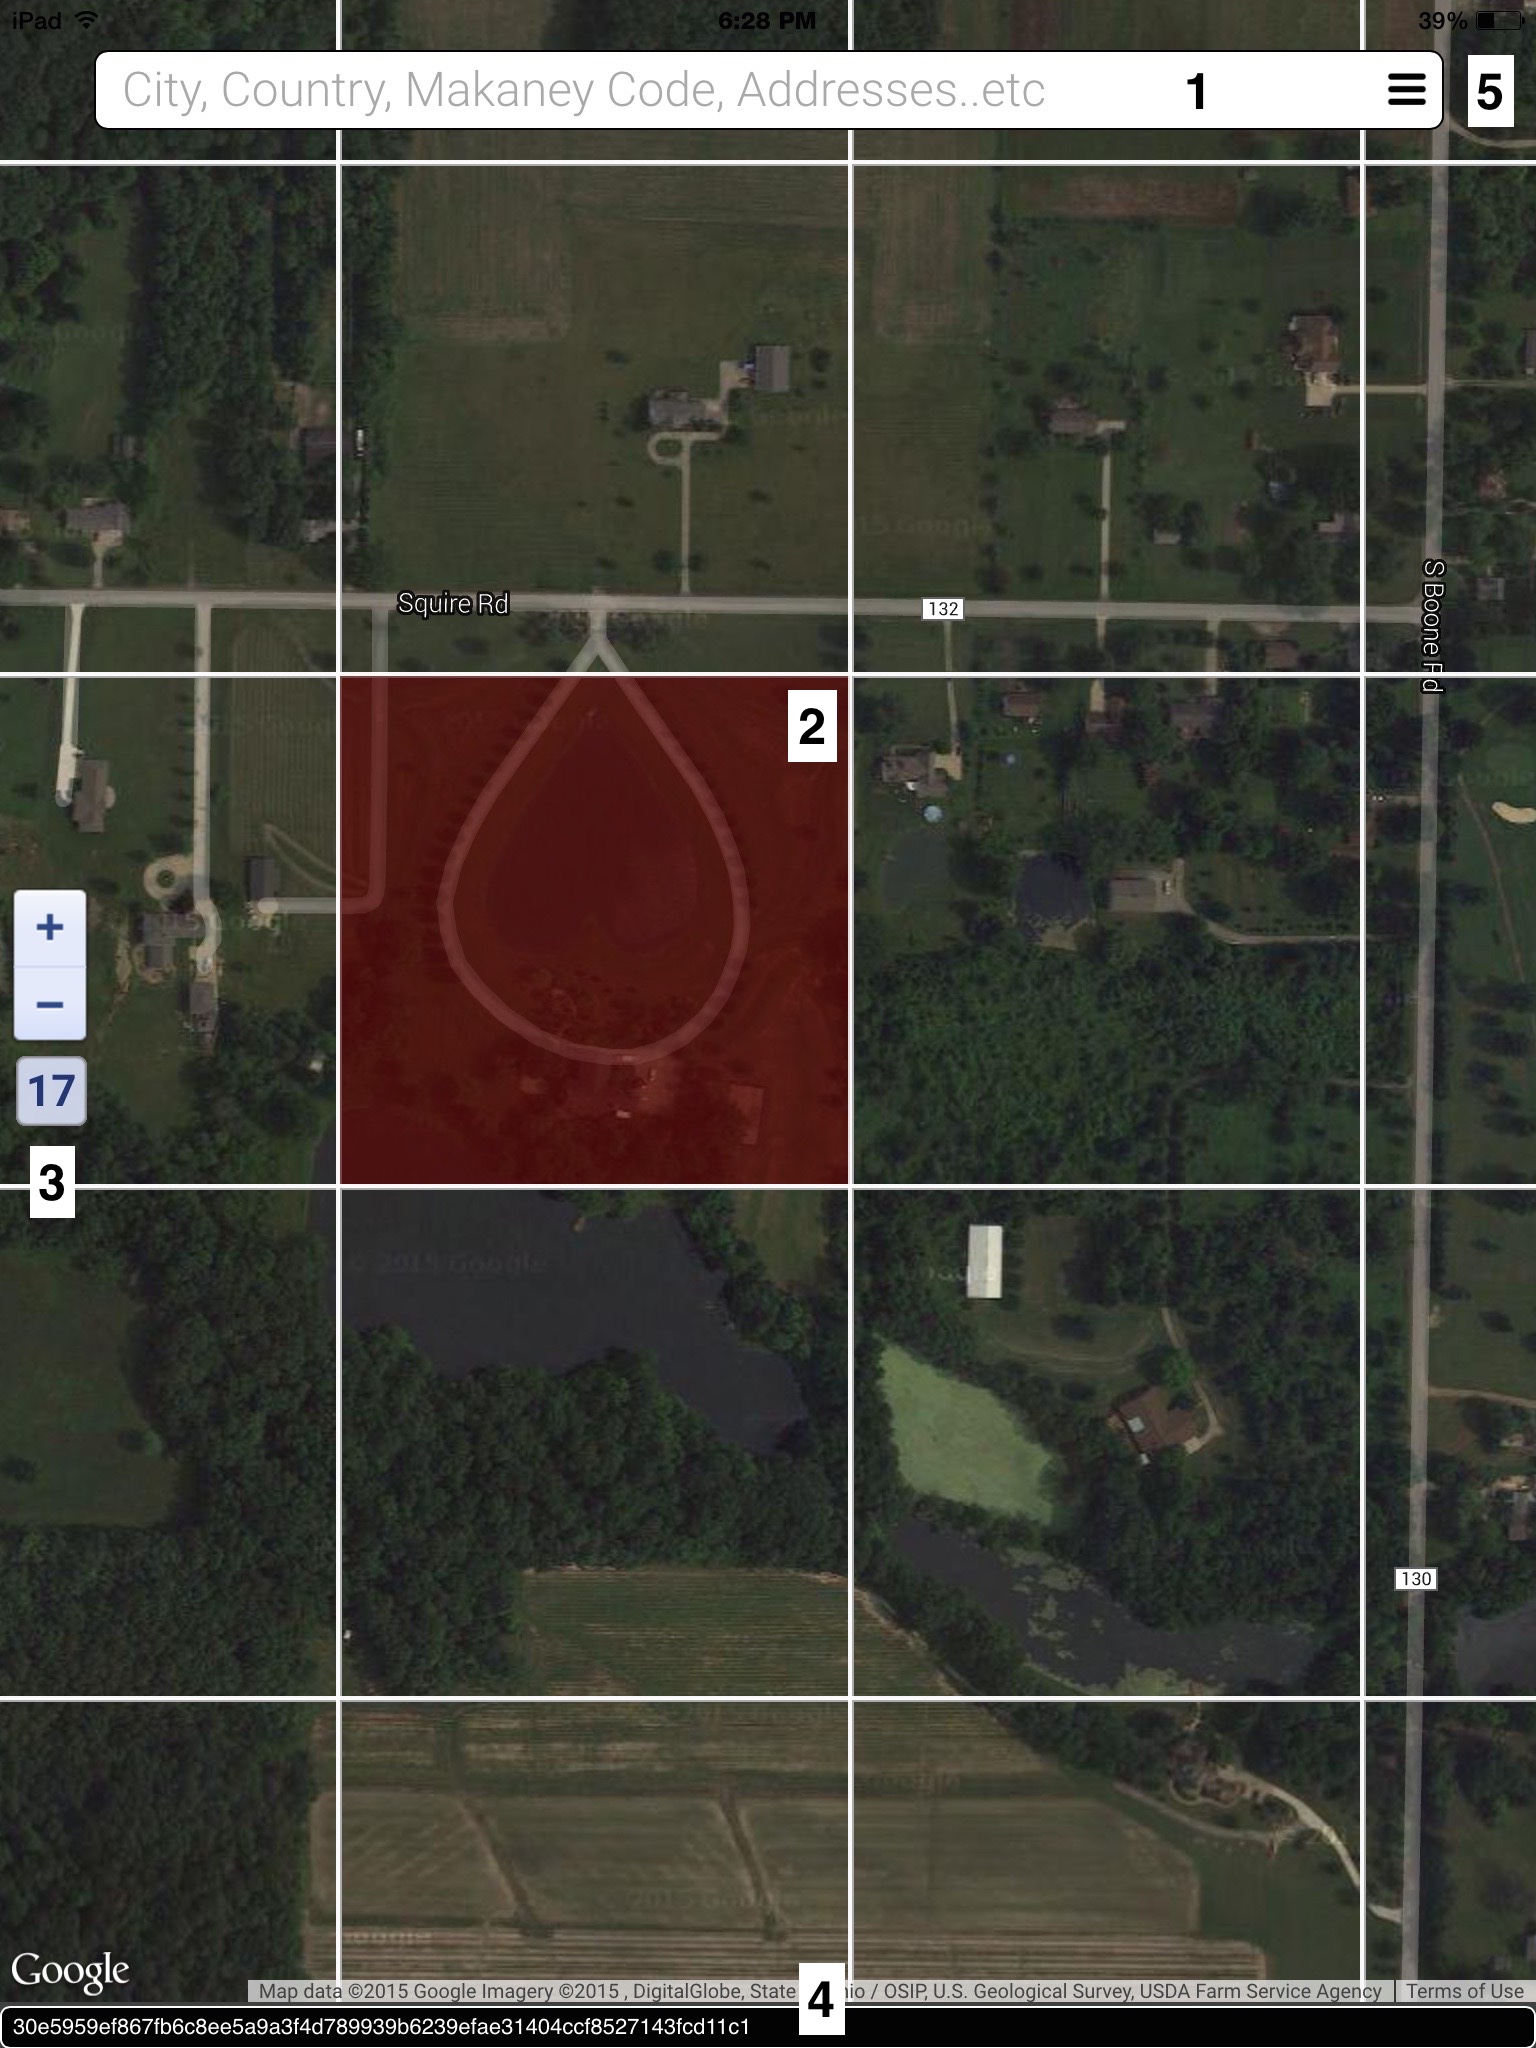
When you launch ZSS Login's App, you will see planet Earth divided into rectangular shaped geographical areas. Each rectangle represent a geographical password. You can select the rectangle by double tapping it, it will be shaded when selected. You can choose more than one location to form your strong geographical password.
Earth's View description:
- Search box: You can enter Cities, Countries , Makaney Code (www.makaney.net), longitude/latitudes, or any address to locate your favorite geographical location.
- Geographical location: A rectangular shaped geographical area (heart pond) selected by the user by double tapping the area and selecting it as her geographical location (Address: Squire Rd,
Columbia Station, OH 44028). Users can select more than one location on planet Earth.
- Current zoom level: When you zoom in or out, the area covered by the rectangle will change. So each rectangle is unique at each zoom level.
- Geographical Password Box: When the user double tap a geographical location the geographical characteristics of the selected places will be extracted and used to form your strong geographical password, which is displayed in the box.
- Tapping the three lines will open the menu. See next section for menu description.
Clicking the home button ( ) of your IOS device, will copy the geographical password to the clipboard. If there is no geographical password available (i.e. no location is selected) pressing the home button will clear the clipboard.
Earth's View Menu
In this section we describe the options in ZSS Login menu.
Menu description:
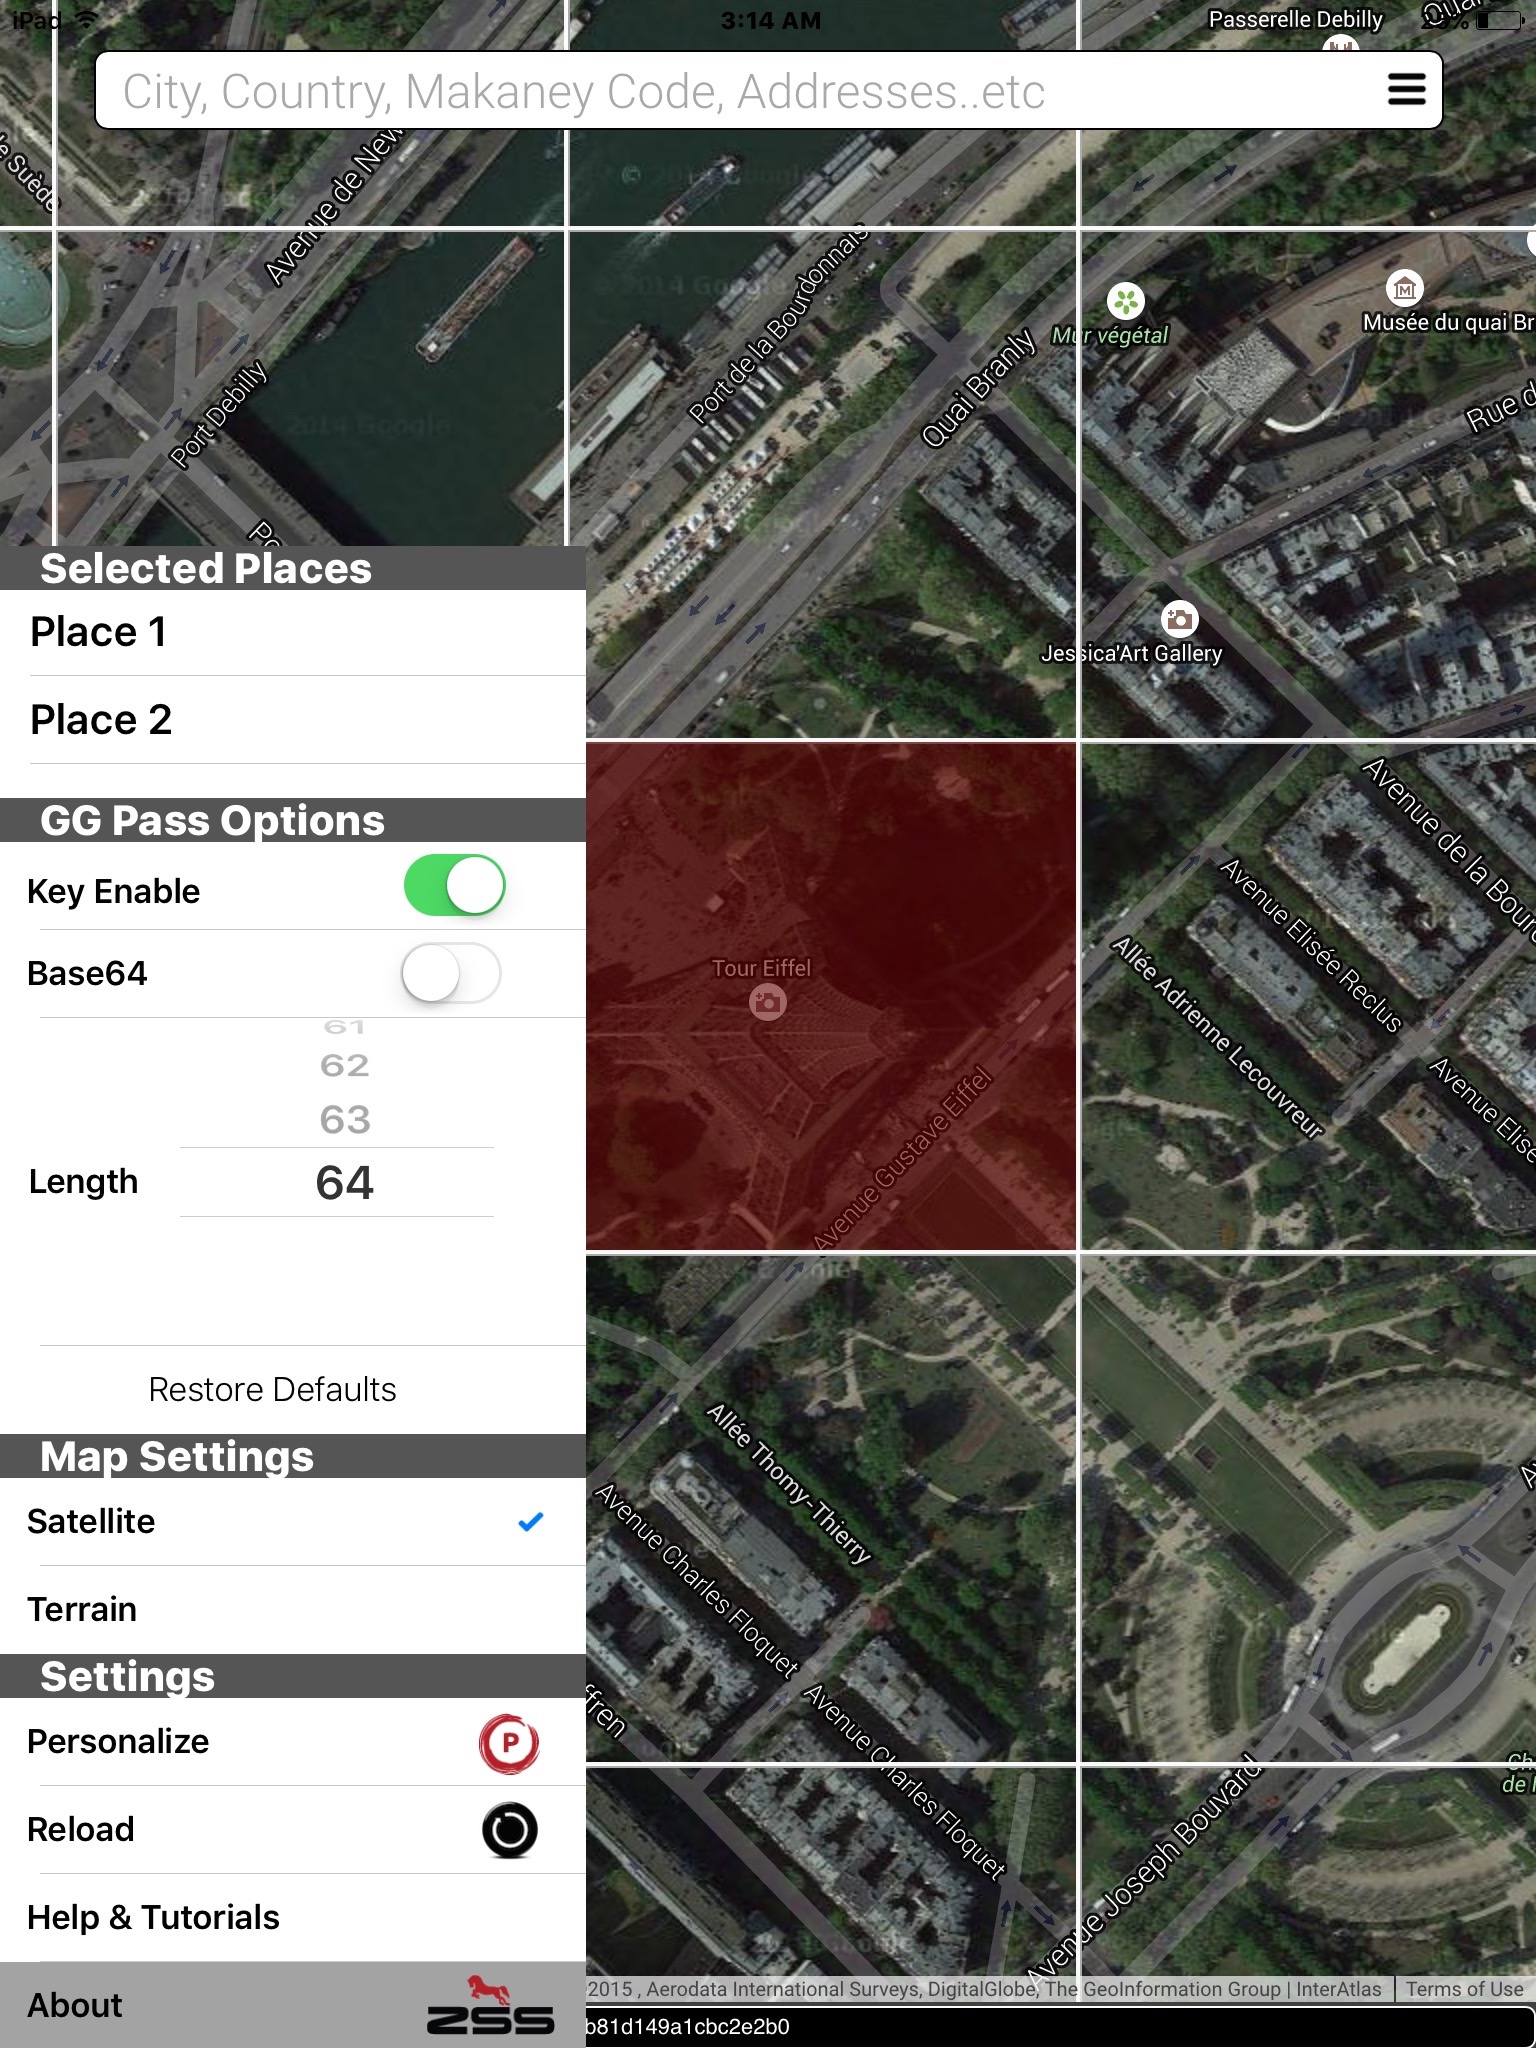
- Selected Places: This section displays the selected places in the order they have been selected. When the user double tap a geographical location on planet earth, a link to the place will appear. Clicking the link will move the map view to the selected place. This helps the user keep track of the places she selected.
- GG Pass Options: This section displays the settings for the user's geographical password.
- Map Settings: This section displays the settings for the map (ZSS Login is using Google Maps).
- Satellite: displays the map based on satellite information.
- Terrain: displays the map based on terrain information.
- Settings: This section displays other settings.
- Personalize: This will open the personalize view. See next section for personalize view description.
- Reload: This option will reload the map.
- Help: Open's help page on web browser.
Personalize
If the map is not personalized then any selected place(s) on planet earth will result in the same geographical password on any device. For example if person X picked Eiffel tower as her geographical location on her laptop the geographical password generated will be the same as person Y who picks the same place at his iPad. Although this might not seem to be troubling, it will make the user vulnerable to shoulder surfing (i.e. looking over someone's shoulder, to reveal geographical password).
Personalization prevents that and makes the users further protected by making each map unique to each user. For example, if user X and Y picked the same geographical location(s) the geographical password generated will be totally different, even that the place is the same. This makes it safe for your selected geographical location(s) to become known to people who can see your screen, because your map has been personalized.
Personalization happens based on a randomly generated key, unique to each user, which gets created upon installation. If the user needs to personalize a map, she should use this key to make the map personal (see tutorials for demos).
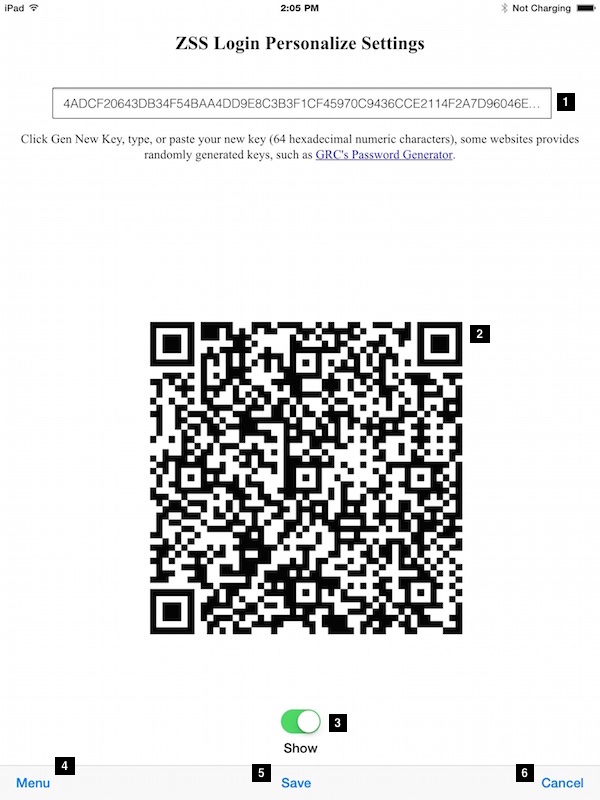
The personalization view takes care of user's personal key settings.
Interface description:
- Editable text box to display a key or a geographical password. If the user switch to the personalization view and there is geographical place(s) already selected in the map, the geographical password will be copied into the text box. This allows the user to easily share the password with friends (i.e. Home wireless network..etc ), whom can scan the QR code from their devices.
- QR representation of the key or the geographical password displayed in the text box.
- Show/Hide switch. If on, displays the content of the text box, if off hides the content of the text box.
- Key Options. See next section for menu description.
- Save button, if clicked will save the key displayed in the text box as the user's new personalization key. Only 64 hexadecimal characters acceptable.
- Cancel button, if clicked will close the view and return to the map.
Key Options
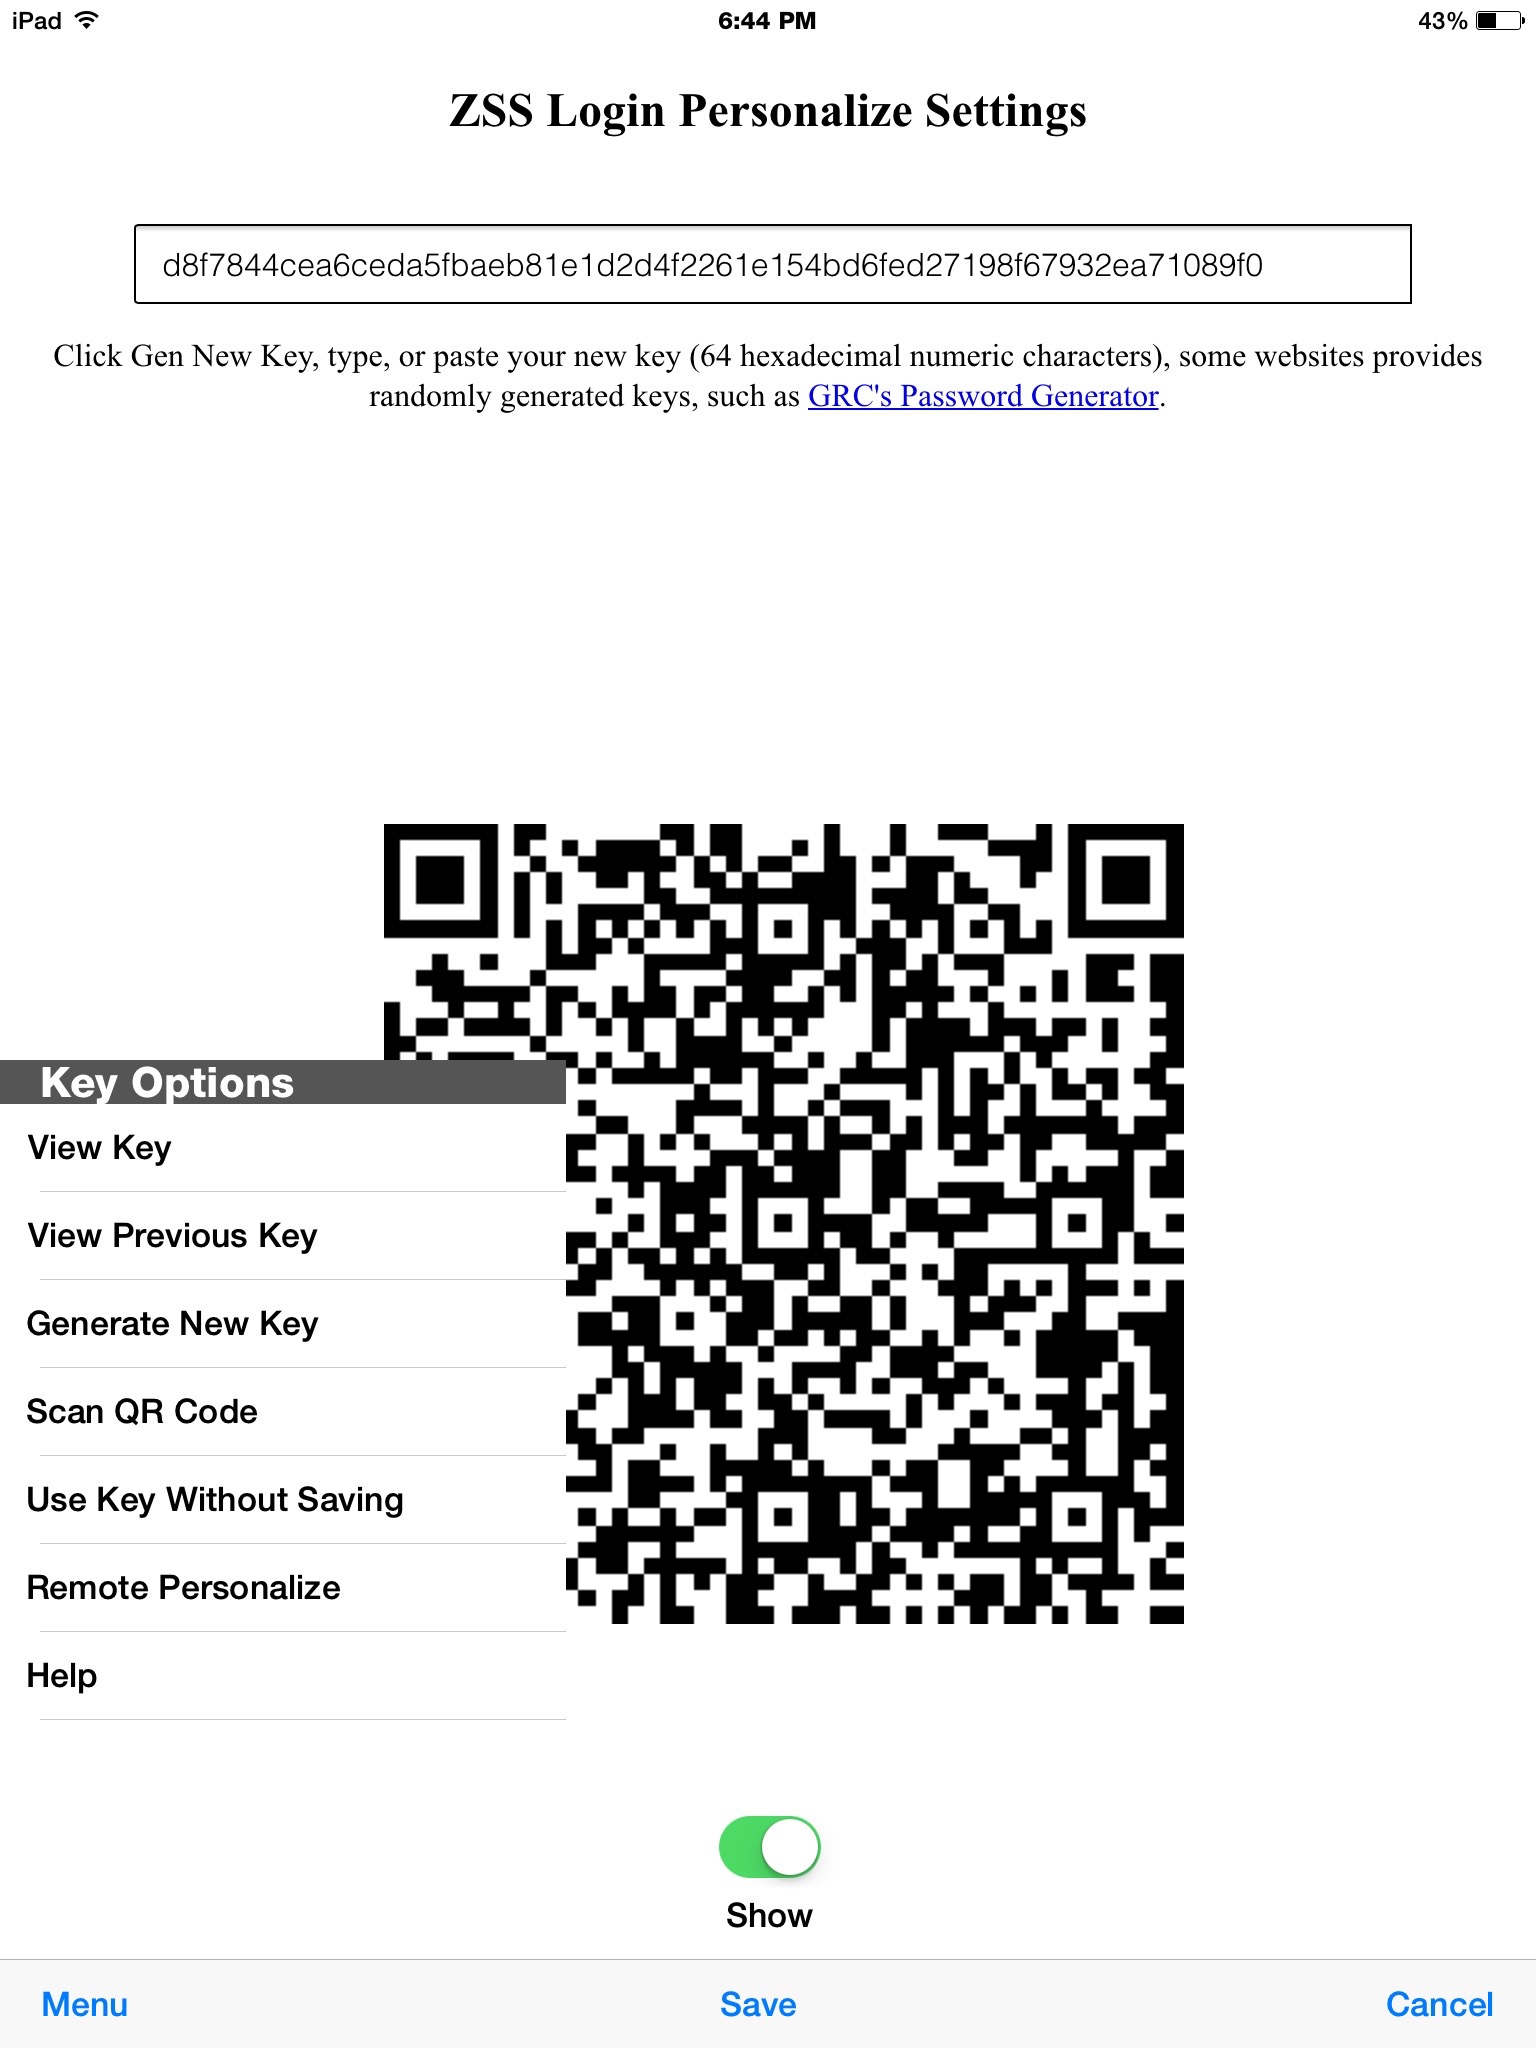
Key options menu description:
- View Key: If selected displays user's current personal key, the one used to generate a keyed-hash message authentication code (HMAC) based on user selected geographical location(s). Users use this key to personalize maps.
- View previous key: If clicked displays user's previous personal key in the text box. Empty if no key exist.
- Generate new key: If clicked generates a new random 256 bit hexadecimal personal key and displays it in the text box. The generation occurs only at the client side. You can also type or paste your own personal key.
- Scan QR Code: Opens device camera to scan QR code, if successful the results will be copied into the text box. Used to personalize ZSS Login.
- Use Key Without Saving: Uses the key in the text box but does not store it. Restarting ZSS Login, returns to user's default stored key. Useful if someone, other than the user, wants to use ZSS Login temporally.
- Remote Personalize: This option allows the user to personalize a map on a desktop or laptop remotely. Opens camera to scan the QR code that appears when users click "No Camera" button at ZSS Login for desktop/laptop. Upon successful scan the map will be personalized, instantly. Here what happens technically:
- When clicking "No Camera" button at the remote device, the browser will generate a random 128 bit hexadecimal number and present it as a QR code.
- When user scan the QR code using ZSS LOGIN's app, it will establish a secure HTTPS connection with zss.net and submit the personal key.
- zss.net will make the key available on the server's cache on a randomly generated secure link that matches the randomly generated hexadecimal number scanned by the mobile with a time to live equal to 15 minutes.
- Remote browser will keep probing for the secure link, until it becomes available, then fetch the personal key and personalize the map.
- The randomly generated secure link is deleted as soon as it is accessed or after 15 minutes, whichever comes first.
- Help: Open's help page on web browser.